Tip: how to make a parchment paper piping cone
Say you want to write “Happy birthday” on a cake. How do you do that?
Well, with a parchment paper piping cone, obviously!
Making a paper piping cone is very easy and it can really help boost the look of your cakes. Not only is it useful to write with melted chocolate, but it can also be used to pipe nice patterns of royal icing, for example.
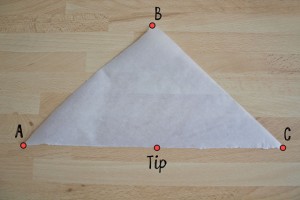
All you need is a square of parchment paper cut in two along the diagonal (yes, that makes it a triangle!). You would expect one of the angles of the triangle to be the tip of the piping, but oh, you would be so wrong. 🙂
Just follow the simple step-by-step instructions below, practice, and then tell me: can you make it in 5 seconds?
How to make a parchment paper piping cone
Directions
1
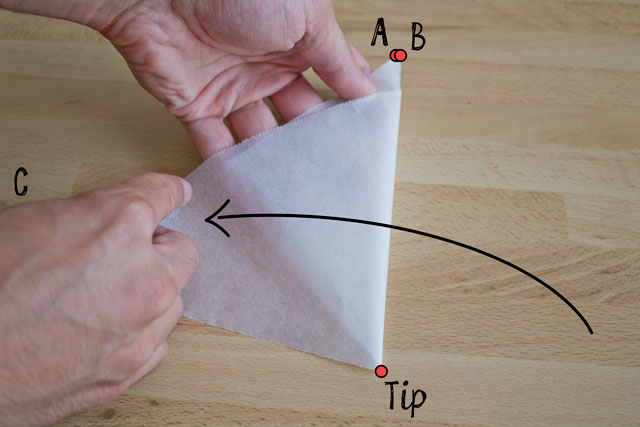
Start with a square of parchment paper and cut it diagonally in two so that you have a right-angled triangle. The triangle has two equal sides and a right angle that I identified with letter B in the picture.
3
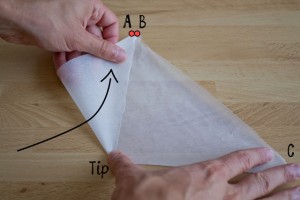
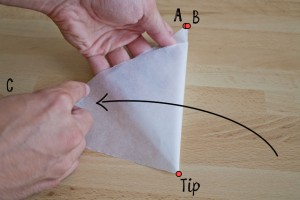
Keep point A and B together with one hand, then roll point C over and around to join the back of points A and B with your other hand.
4
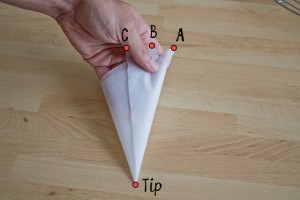
You can fit your hand inside the cone while rolling point C, so to form an opening. The bottom of the cone should be completely closed.

 Print recipe